How to Make Tofu at Home: An Easy Step-by-Step Guide
Preparing tofu at home can seem like a scary process but once you've mastered it, it's really easy—and so worth it! Whether you're a vegan, vegetarian or simply a lover of fresh, homemade food, preparing your own tofu means you can dictate the flavour and texture and steer clear of the plastic and unnecessary energy consumption that comes with shop-bought options.
This makes around 330 grams of tofu, but it can be reduced or increased depending on your requirements. Let's proceed!
Ingredients & Equipment

- 1 cup (180g) dry soybeans (like these biodynamic, Australian-grown beans from Eka Wholefoods)
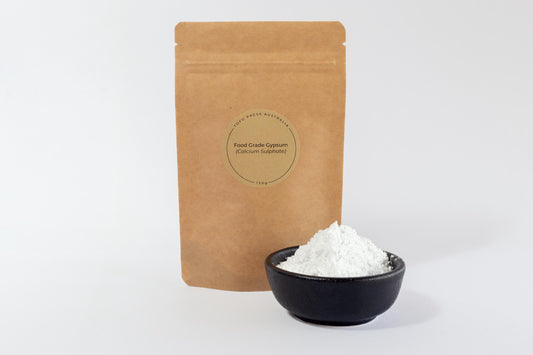
- 1.5 teaspoons food grade gypsum powder (or nigari powder)
- 2 litres filtered water plus extra for soaking soybeans
-
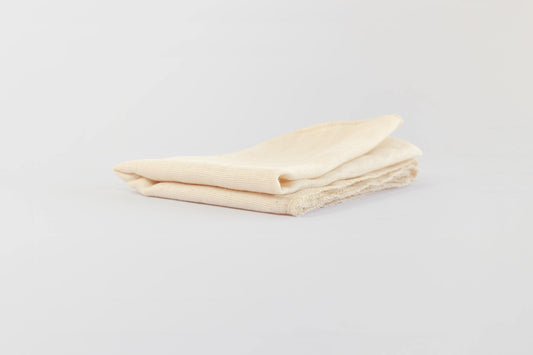
Muslin cloth
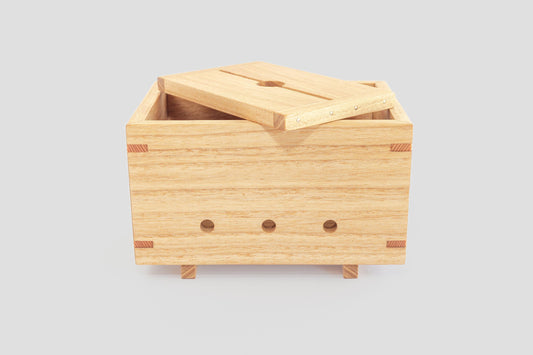
- Tofu press (we're using one of our handmade presses)
- Blender, food processor or cold-press juicer.
- Large stainless steel pot with lid
- Colander
- Slotted Spoon
Step 1: Soak the Soybeans
Begin by soaking 1 cup or 180g of dry soybeans in an adequate amount of water for 8-12 hours or overnight. They will double or even triple in size, so use at least double the amount of water compared to soybeans. Drain after soaking.
Step 2: Blend the Soybeans

Note: A cold-press juicer (like this one) can be used to process the soaked soybeans. Add them slowly, interspersed with water, then rinse out the juicer with any remaining water. We find this process less labour-intensive but you will get a slightly lower tofu yield (about 5-10%). You can skip straight to Step 5 if using a juicer.
Add the soaked soybeans and 1 litre of the filtered water to a high-powered blender or food processor. Blend on high for 30 seconds, or until the mixture is as smooth as possible. The smoother the mixture is, the better your yield of tofu will be. The smoothness of the mixture also influences how difficult the soy milk will be to strain. We find that blending to an ultra-fine mixture makes the soy milk easier to strain, with a medium-fine mixture being the hardest to strain.
Step 3: Strain the Soy Milk

Place a colander over a large stainless steel pot and line it with a muslin cloth. Pour half of the blended soybeans into the cloth and squeeze out the liquid by hand.

Remove the pulp from the muslin, then repeat for the rest of the blended soybean mixture. You'll be able to extract more water from the soybeans if you do this in small batches. Don't throw away soybean pulp (okara), it is quite flavoursome and can be added to numerous recipes like brownies, cakes and biscuits.
Step 4: Clean the Blender
Rinse the blender with the remaining 1 litre of water and strain it through the muslin cloth to wash out any leftover soy milk.
Step 5: Heat the Raw Soy Milk

Set the pot on the stovetop and heat on high, stirring continually. Scrape the bottom and sides as you stir to ensure that the soy milk does not stick to the pot. Once it starts to boil, it will foam up and suddenly expand, so stay vigilant.

Once it has reached boiling, turn the heat down to low and simmer for 5-15 minutes. The longer you simmer, the less 'beany' the tofu (or soy milk) will taste. We suggest 12 minutes of simmering for the best flavour.
Step 6: Cool the Soy Milk

Turn off the heat and allow the soy milk to cool down to around 82°C. You can use a thermometer to check the temperature or simply allow it to cool for 2-5 minutes depending on room temperature. It is important not to add the coagulant when the milk is too hot (over 90°C), as this would result in grainy tofu.
Step 7: Add the Coagulant

In a heat-resistant jug, mix 1.5 teaspoons of gypsum powder (or nigari) and 1 cup of boiling water. Stir to combine. Create a whirlpool in the soy milk by stirring in one direction and slowly pour the gypsum solution into the pot.

The gypsum will not dissolve in the water, so the swirling motion is used to evenly spread it throughout the soy milk. Once finished, place the lid on the pot and leave it to coagulate for about 10 minutes.
Step 8: Check the Coagulation

After 10 minutes, you should see curds (solid tofu) surrounded by a clear yellowish liquid (whey). If milky liquid is still visible, stir it gently and reheat for a few more minutes at very low heat.
Step 9: Press the Tofu

Prepare the tofu press by lining it with a muslin cloth; dampening the cloth helps it to stay in place. We like to place the press on the kitchen sink drainboard so it can freely drain while the tofu presses but you can also place it in an oven tray or dish.
Using a slotted spoon, scoop the curds into the press. The smaller curds can be captured by pouring the remaining liquid (whey) through a strainer or colander.
The whey can be saved and used in broths, stocks or noodle soups.

Once the curds are in the press, fold the muslin cloth over the top tightly and neatly. Place the lid on top and add 1-2 kilograms of weight. We use two old soy milk cartons filled with water. Let it sit for at least 20 minutes. The longer you leave it, the firmer the tofu will be. We find that leaving it until it’s nearly cool (1-2 hours) gives us a lovely medium-firm tofu.
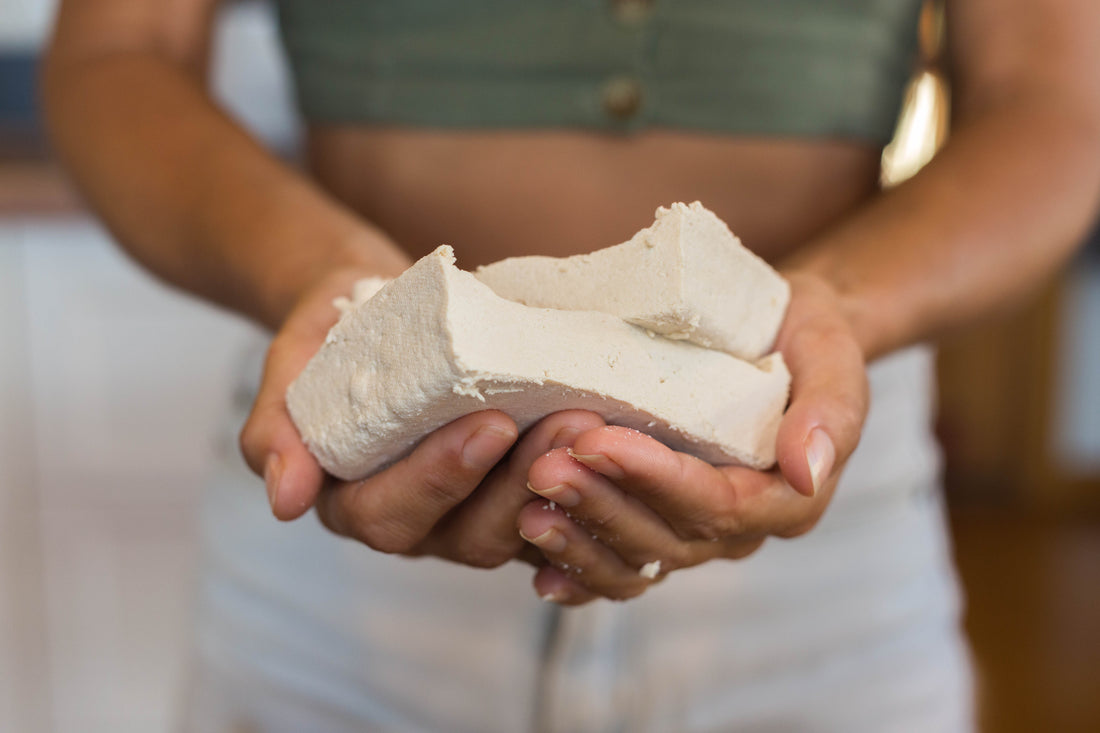
Step 10: Enjoy Your Homemade Tofu

Once the tofu has been pressed, you can remove it from the press and enjoy it right away, or store it submerged in water in the fridge for up to 7 days.
---
And there you have it! You've just made your own fresh tofu. It's simple to make but it's such a treat to eat tofu that you've prepared yourself. From this basic recipe, you can experiment with the firmness until it is to your liking. Happy tofu-making!
Troubleshooting Coagulation
Successful coagulation depends on a variety of factors but it is mainly influenced by temperature and the amount/type of coagulant used. Gypsum tends to be slower to coagulate (10-20mins), while nigari often takes less than 5 minutes. The amount of protein and fat content varies between soybeans, which can also influence coagulation. Perfecting this process will require some tweaking to adjust to the different factors present in your kitchen but the following steps should remedy most coagulation issues:
When using gypsum powder (calcium sulphate) or nigari (Magnesium Chloride), ensure the soy milk is around 82°C before adding the coagulant. You can estimate this by waiting 2-5 minutes after turning off the heat, though a thermometer is ideal. Also, make sure the water used to mix the coagulant is boiling, as cooler water can lower the temperature of the soy milk and lead to incomplete coagulation.
To maintain the temperature at 82°C while the soy milk is coagulating, you can use a small burner on low. But make sure the temperature doesn't get too high or you'll end up with grainy tofu.
If coagulation still isn’t complete, mix an additional 1/4–1/2 tsp of gypsum or nigari with 1/4 cup boiling water and gently stir it into the soy milk. Return the soy milk to a low heat until it fully coagulates.